¶ Employees & Groups
The Employees & Groups section is where you manage the people targeted by your phishing campaigns and platform user accounts. Access it from the left sidebar.
This section has two tabs:
- Groups — organize employees into targetable groups
- Employees — manage individual employee records and platform user roles
¶ Employees
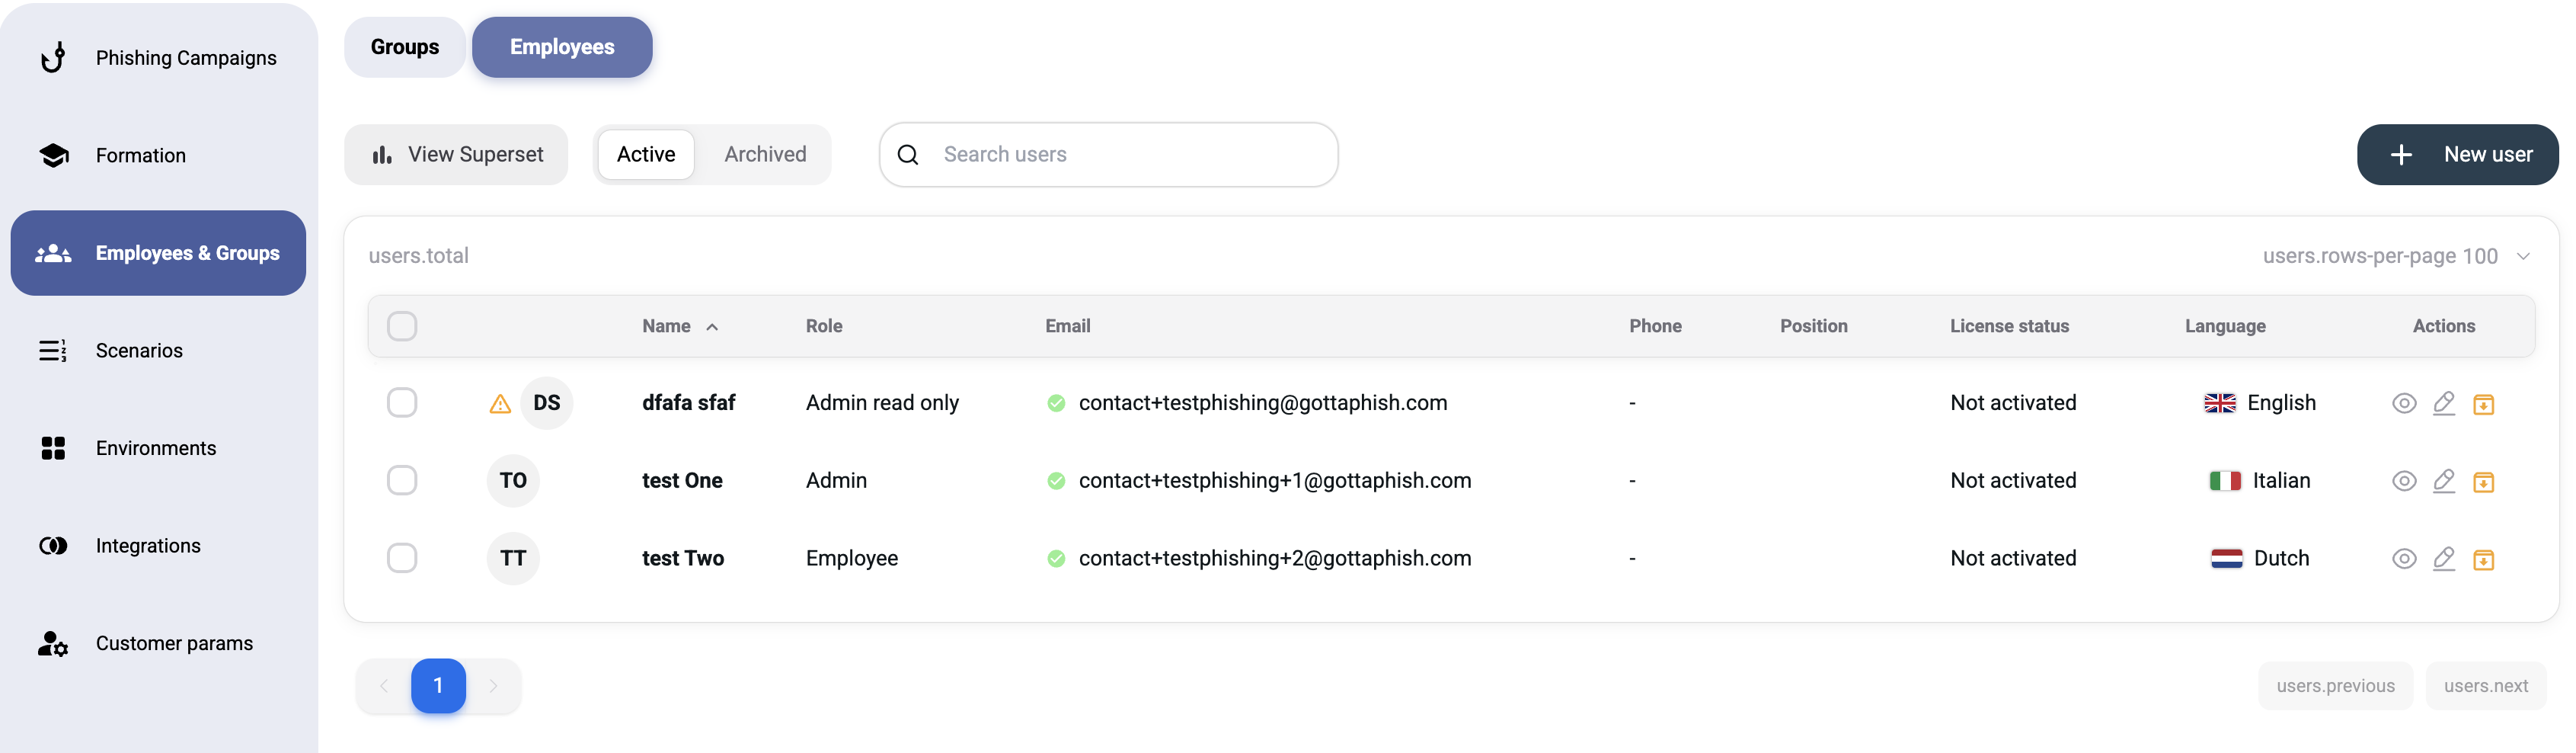
The Employees tab displays all registered employees and platform users in a single unified list. Platform administrators appear here with an Admin role badge, giving you full visibility of all accounts in one place.
| Column | Description |
|---|---|
| Name | Full name |
| Email address (phishing target and/or login username) | |
| Phone | Phone number (used for SMS-based campaigns) |
| Position | Job title |
| Role | Platform role — Admin for administrators, job title for standard employees |
| License | License status |
Use the Active / Archived tabs to filter by status, and the Search users field to find specific individuals.
¶ Adding a New Employee
Click New employee to open the creation dialog.
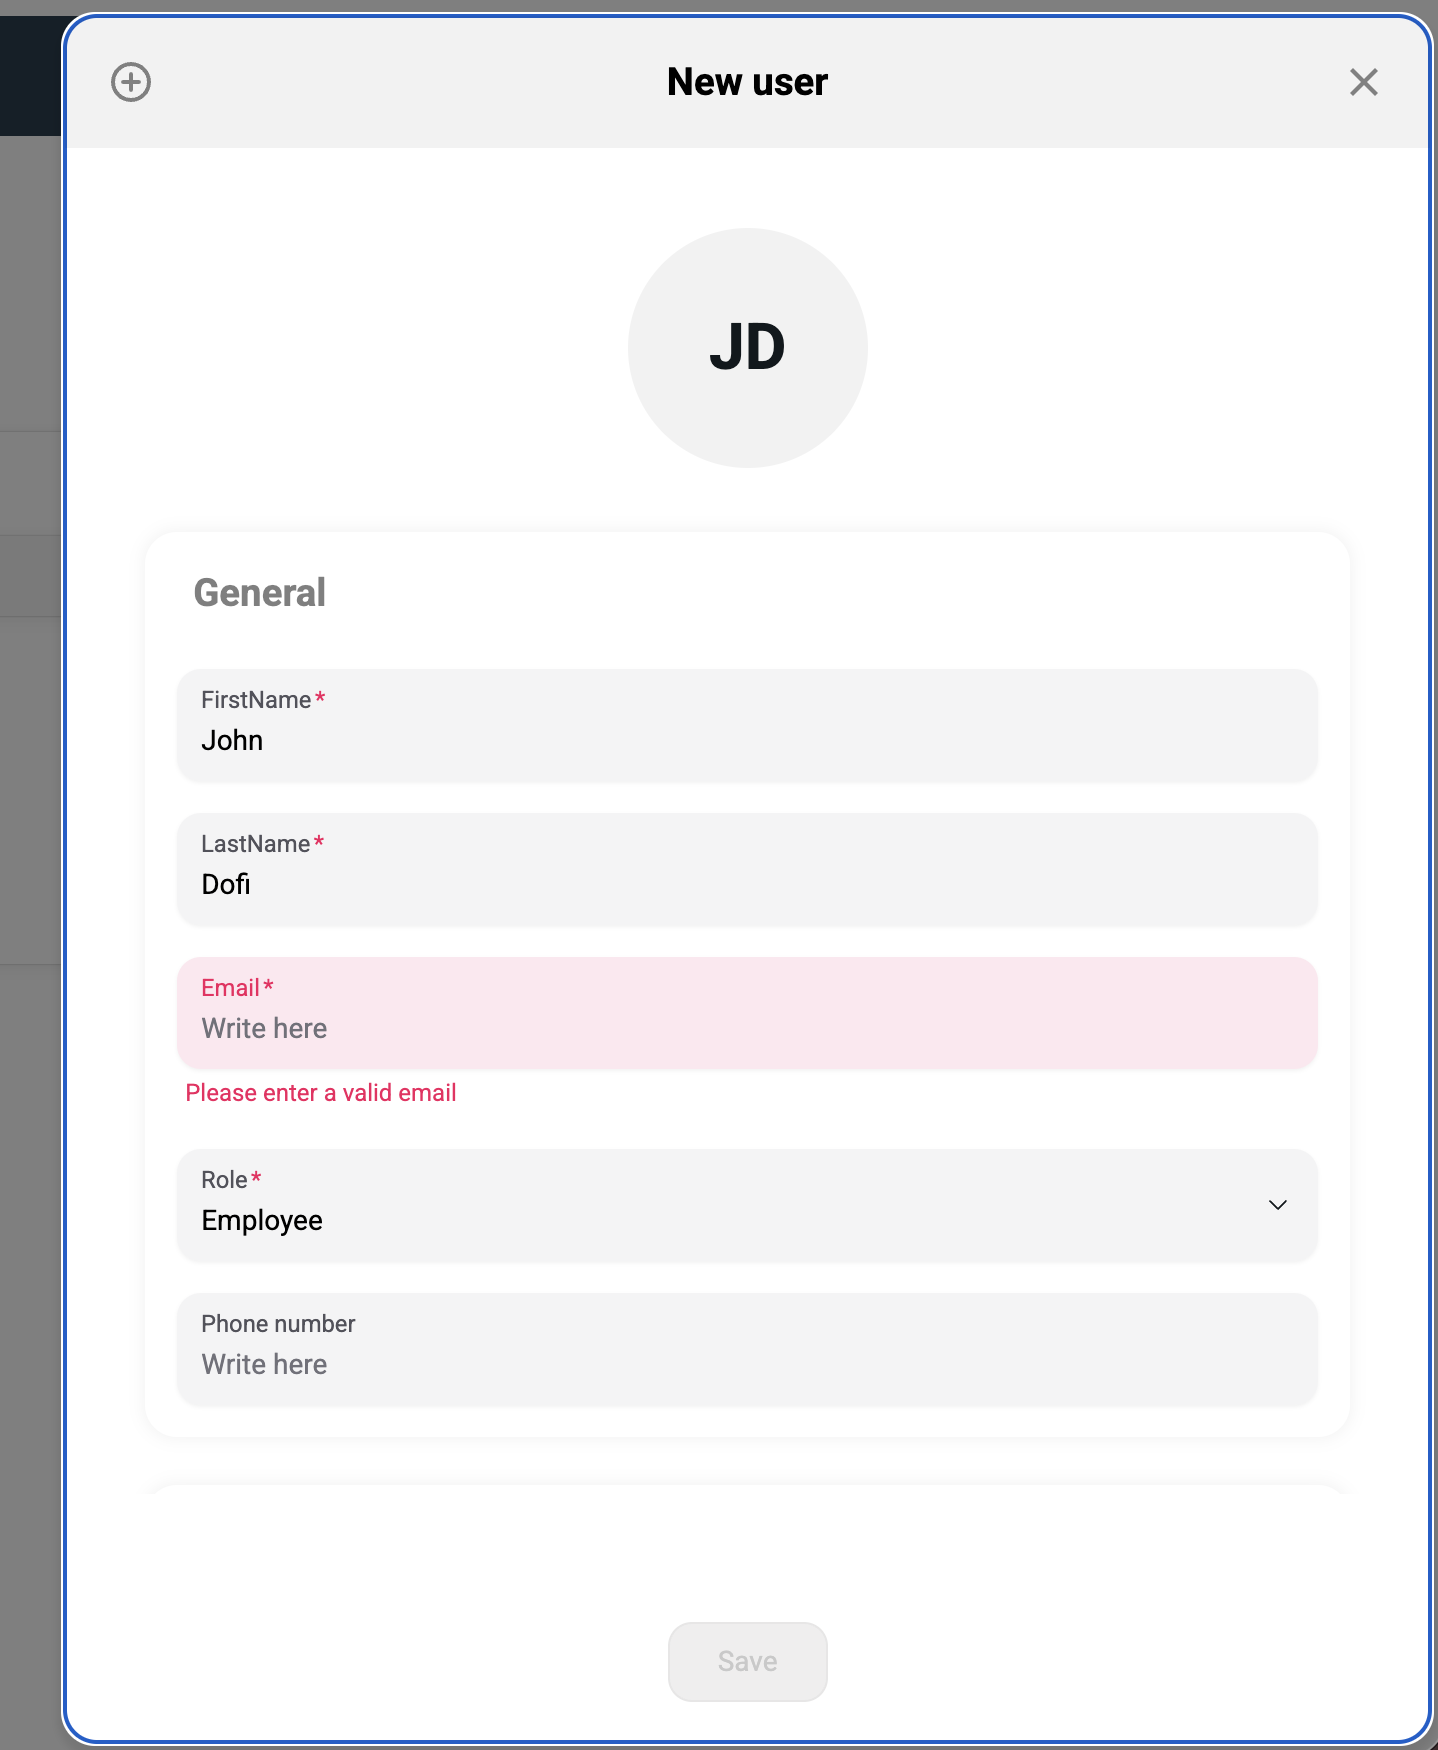
¶ General Information (Required)
| Field | Required | Description |
|---|---|---|
| FirstName | Yes | First name |
| LastName | Yes | Last name |
| Yes | Corporate email address — this is the phishing target | |
| Phone number | No | Mobile number for SMS campaigns |
| Language | No | Interface language for this user (e.g. French, English) |
¶ Job Information (Optional)
| Field | Description |
|---|---|
| Manager | Select the employee's manager from existing employees |
| Role | Job role or title |
| Department | Department name (used for intelligent group filtering) |
Tip: Fill in Department and Position fields — they enable powerful filtering with Intelligent Groups.
¶ User Management
Platform user accounts and roles are managed directly from this page. This consolidates access control and employee management in one place.
¶ Creating a New User
To create a platform user account, click New employee and complete the form. In addition to employee fields, assign a platform role:
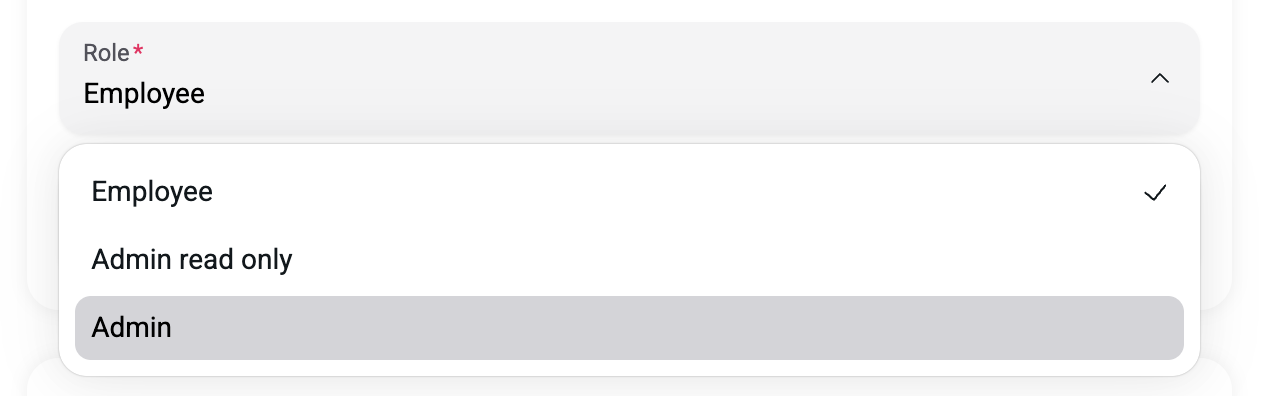
¶ Role Permissions
| Role | Access Level |
|---|---|
| Admin | Full read/write access to all features, including Customer Params, license management, and system settings |
| Admin Read Only | View-only access to all features, including Customer Params. Cannot create, edit, or delete any data |
| User | Access to campaigns, scenarios, environments, employees, and integrations. No access to Customer Params |
¶ Advanced Settings
Expand the Advanced settings toggle to access additional options:
| Option | Description |
|---|---|
| New Password | Set an initial password for the account. Leave empty to let the user set their own |
| Activate License Directly | Immediately assign a license to this user upon creation |
| License type to activate | Choose the license duration: Monthly (no commitment), 12 months, or 36 months |
Note: The Activate License Directly toggle is enabled by default. Disable it if you want to assign a license later from the License management tab.
¶ Groups
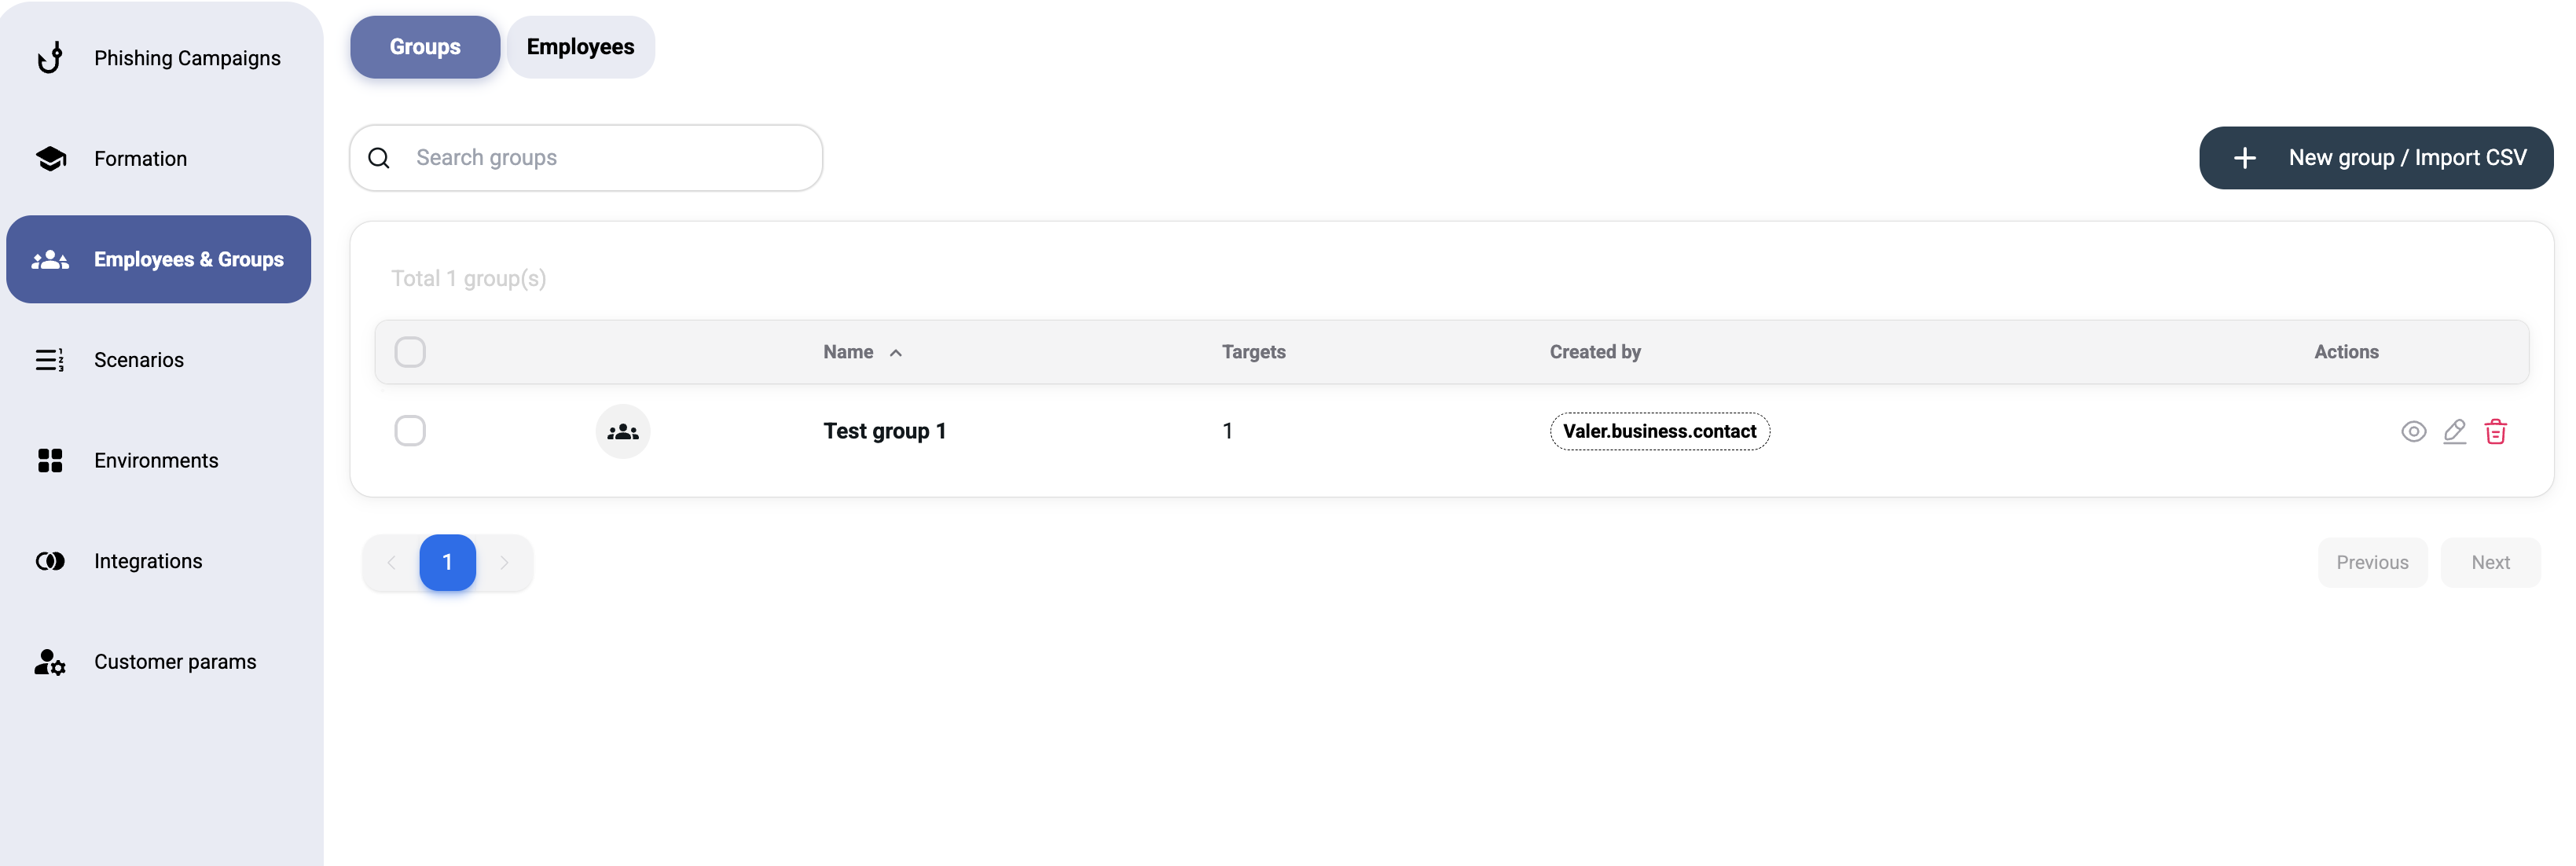
Groups are collections of employees that you target with campaigns. The Groups tab shows:
| Column | Description |
|---|---|
| Name | Group name |
| Targets | Number of employees in the group |
| Created by | User who created the group |
| Actions | Edit or delete the group |
¶ Creating a New Group
Click New group / Import CSV to open the group creation flow. You'll first choose the group type:

¶ Manual Group
A manual group is a static collection of employees that you manage by hand.
Step 1 — General Information
- Name (required) — give your group a descriptive name (e.g., "Finance Team Q1")
Step 2 — Add Targets
You can add employees in two ways:
- Search and select — use the search field in the "Group targets" section to find and add employees individually
- Import CSV — click Import CSV to bulk-import employees from a CSV file
Tip: Click Download CSV Template to get the correct CSV format before importing.
The Group targets table shows:
| Column | Description |
|---|---|
| Nom (Name) | Employee name |
| Email address | |
| Poste (Position) | Job title |
| Département (Department) | Department |
¶ Intelligent Group
An intelligent group is a dynamic, filter-based group that automatically updates its membership based on rules you define.
Step 1 — General Information
- Name (required) — name for the intelligent group
Step 2 — Filters
Select filtering criteria from the Targets dropdown:
| Filter | Description |
|---|---|
| All targets | Include every employee |
| whose domain name is | Filter by email domain (e.g., @company.com) |
| never phished | Only employees who haven't been targeted yet |
| added within the last | Recently added employees (specify time period) |
| who are recidivists | Employees who have clicked or submitted credentials in past campaigns |
| whose position is | Filter by job title |
| whose department is | Filter by department |
| whose manager is | Filter by manager |
| whose language is | Filter by language |
You can combine multiple filters to create precise targeting rules.
Example: Target all employees in the "Sales" department who are recidivists — this creates a focused re-training group for your most vulnerable sales staff.
¶ Bulk Import via CSV
For organizations with many employees, CSV import is the fastest way to populate the platform.
¶ CSV Format
Download the template using the Download CSV Template button. The expected columns are:
FirstName,LastName,Email,Position,Department
John,Doe,john.doe@company.com,Sales Manager,Sales
Jane,Smith,jane.smith@company.com,Developer,Engineering
¶ Import Steps
- Go to Groups → New group / Import CSV
- Choose Manual group
- Click Import CSV
- Select your CSV file
- Review the imported employees in the targets table
- Save the group
Warning: Ensure email addresses are valid and unique. Duplicate emails will be skipped during import.
¶ Best Practices
- Use intelligent groups for ongoing campaigns — they automatically include new employees matching your criteria
- Segment by department — different departments face different phishing risks
- Create a "recidivists" group — target repeat offenders with additional training
- Keep employee data current — outdated emails result in failed deliveries
- Start with a test group — create a small group of volunteers to test campaigns before going organization-wide
- Limit Admin accounts — only assign the Admin role to users who genuinely need access to Customer Params and system settings
¶ Intelligent groups
Besides standard groups, you can create an intelligent (smart) group whose membership updates automatically from rules — for example by position, department or language. It is ideal for groups that change over time, since you never maintain the member list by hand.