¶ Explanation Email
An explanation email is an awareness message sent to campaign targets after a phishing simulation is completed. It reveals that the email was a test and provides educational content to help employees recognize real threats in the future.
Setting up explanation emails involves three steps across three different sections of the platform:
Step 1 — Customer Params   →   Configure the sender address
Step 2 — Scenarios         →   Write or generate the email content
Step 3 — Campaigns         →   Choose who receives it on completion
¶ Step 1 — Configure the Sender
Before sending any explanation email, you need to define the sender identity used for these messages. This is done once per customer in Customer Params.
- Go to Customer Params → Customers management
- Click Edit on the relevant customer
- Expand Advanced Settings
- Fill in the Explanation email sender fields:
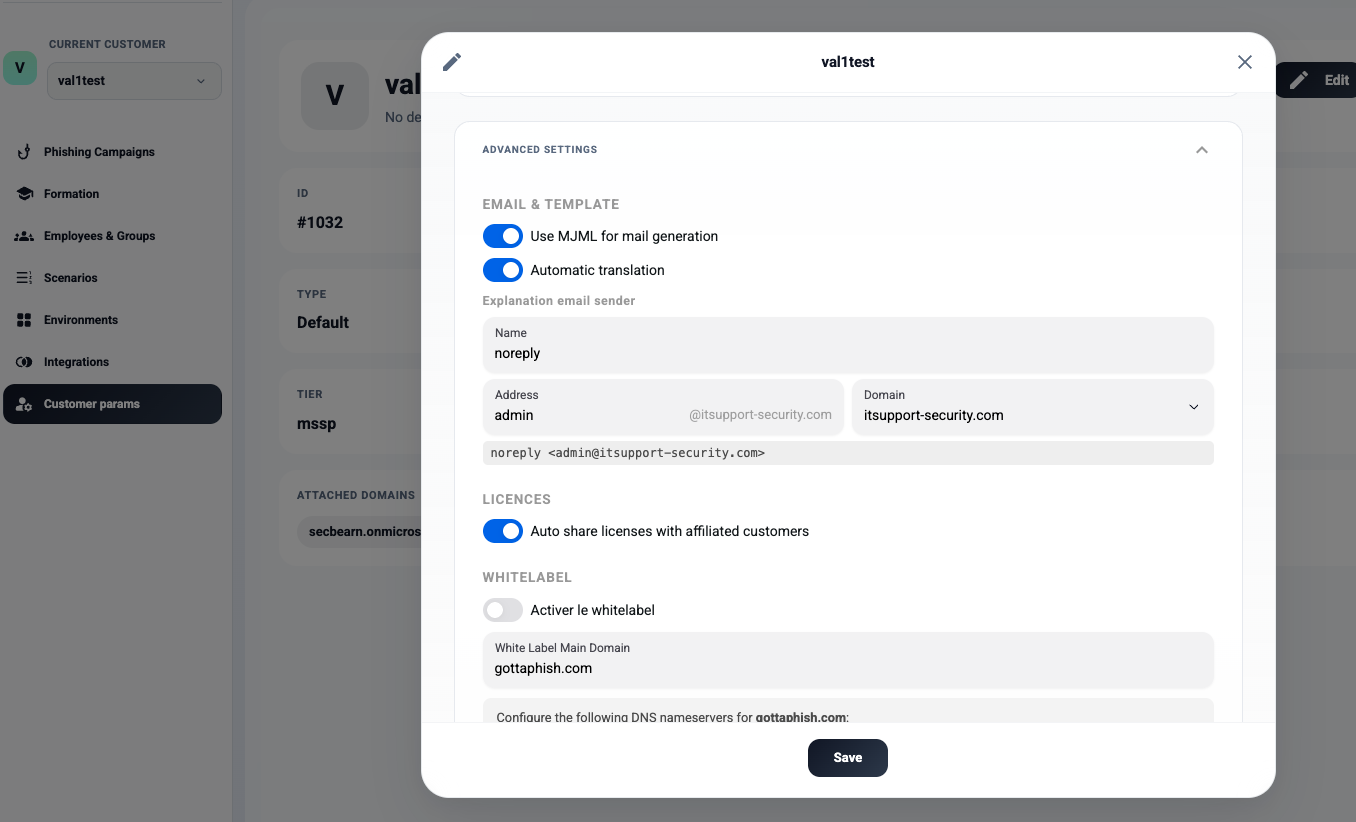
| Field | Description |
|---|---|
| Name | Display name shown to recipients (e.g., noreply) |
| Address | Local part of the email address (e.g., admin) |
| Domain | Select from your configured domains (e.g., company.com) |
The resulting sender address is previewed below the fields — for example: noreply <admin@company.com>.
Important: This sender must be configured before completing any campaign that uses an explanation email. If left empty, sending will fail.
¶ Step 2 — Create the Explanation Email Content
Each scenario can have its own explanation email, tailored to the phishing theme used in the simulation.
- Go to Scenarios and open the scenario you want to configure
- In the top-right area of the scenario editor, click Generate explanation email
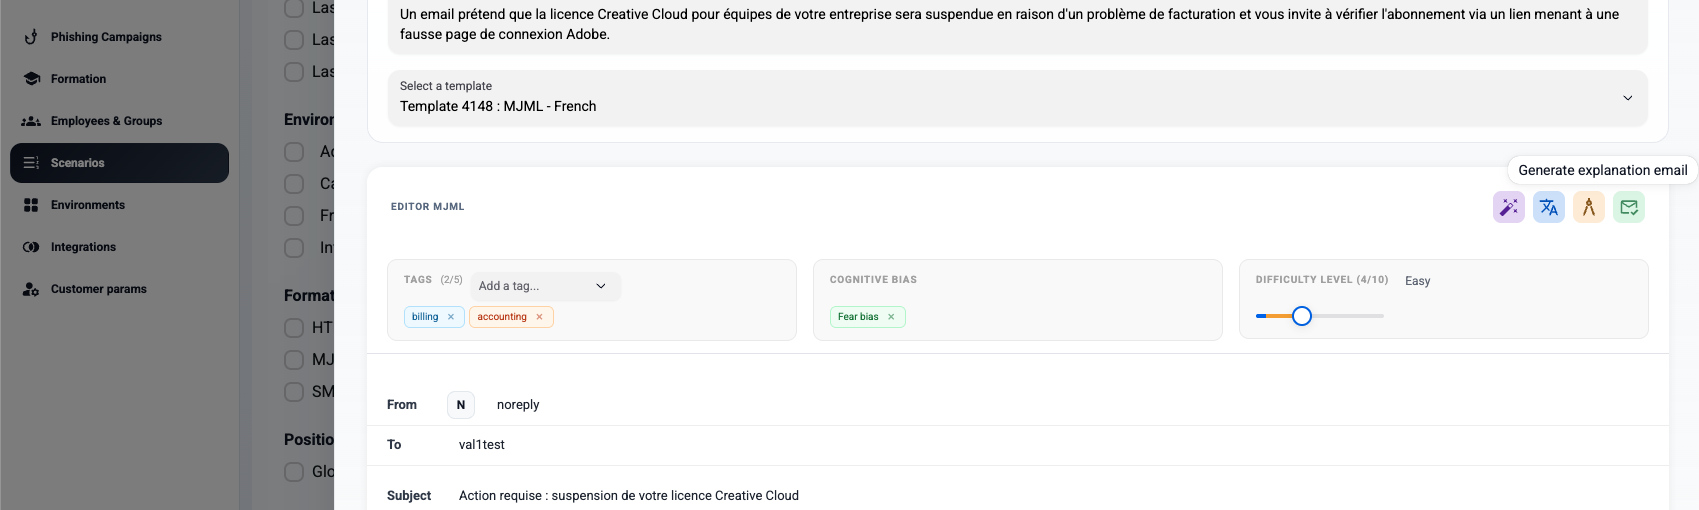
Four action icons are available next to the button:
| Icon | Action |
|---|---|
| AI (magic wand) | Automatically generate the explanation email content using AI, based on the scenario's theme |
| Translate | Translate the explanation email into another language |
| Preview | Preview how the email will appear to recipients |
| Send test | Send a test copy to verify the email before the campaign ends |
Tip: Use AI generation to quickly produce relevant content — the AI uses the scenario's phishing theme and context to write a coherent awareness message.
¶ Step 3 — Send on Campaign Completion
When a campaign is ready to close, click Complete campaign from the campaign actions. A dialog will appear with delivery options for the explanation email.
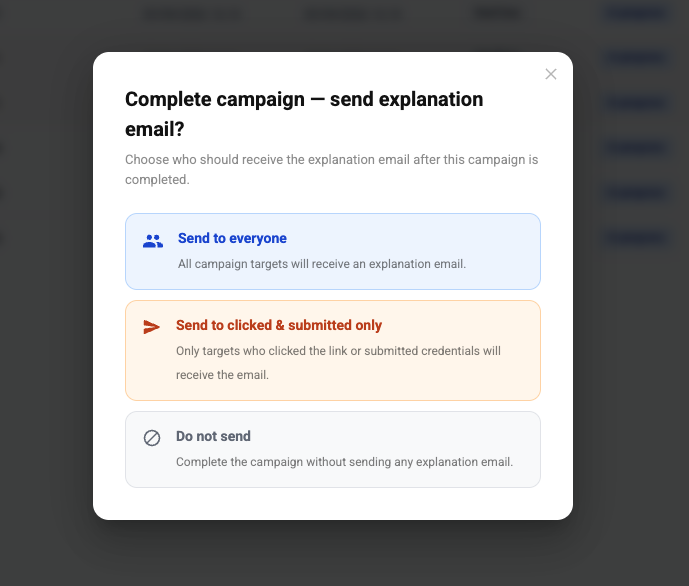
| Option | Description |
|---|---|
| Send to everyone | All campaign targets receive the explanation email, regardless of how they interacted with the phishing message |
| Send to clicked & submitted only | Only targets who clicked the link or submitted credentials receive the email — focuses awareness training on the most at-risk individuals |
| Do not send | Complete the campaign without sending any explanation email |
Note: The Send to clicked & submitted only option is the recommended approach for targeted follow-up — it avoids alerting employees who successfully ignored the phishing attempt.
¶ Prerequisites Checklist
Before using explanation emails, verify the following:
- Explanation email sender configured in Customer Params → Edit → Advanced Settings
- Explanation email content created for each scenario you plan to use
- Sending domain is properly configured in Integrations → Domains
- Image Display (Non-Microsoft Integrations): If the target client does not use the Microsoft integration, external images may be blocked by default. In this case, users should contact their local IT administrator to obtain and run a specific PowerShell script that replicates the image rendering behavior.
¶ Choosing the sender
Explanation emails are sent from a sender you configure per customer (not per campaign). To set it:
- Go to Administration → Customers and open the customer (edit).
- In the Email & Template section, find Sender for explanation emails.
- Fill in three fields:
- Name — the display name shown to recipients (e.g. Security Team).
- Address — the local part of the address (e.g. noreply).
- Domain — pick one of your explanation-email domains from the dropdown.
- A preview shows the assembled sender (e.g.
Security Team <noreply@learn.example.com>). Save the customer.
If no sender is configured, explanation emails cannot be sent. The domain dropdown lists the domains registered with the Explanation email use case (managed in the Domains tab).